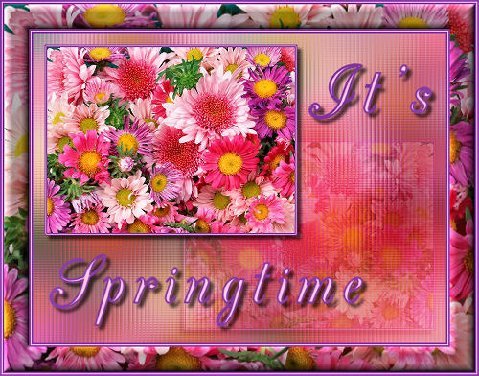
IT'S SPRINGTIME
by Irene P.
This tutorial was made in PSP9.
OK. Let's go.
1. Open your chosen graphic in PSP. (This tut works best with a graphic similar to the one I've used.)
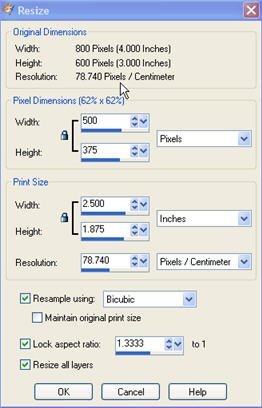
Image>resize> 500 pixels on the longest side> Resample Bicubic > Aspect ratio locked> resize all layers.
2. Use your dropper,![]() to select a dark and a light color from your graphic. Left click for foreground color and right click for background color.
to select a dark and a light color from your graphic. Left click for foreground color and right click for background color.
3. Press shift/D twice to make two copies of your graphic. Minimise these two copies for later use.
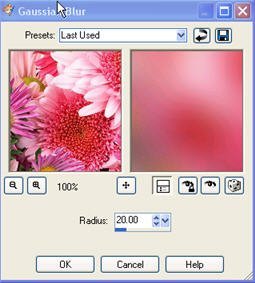
4. Working on your original image. Adjust> Blur> Gaussian blur> 20. Click OK
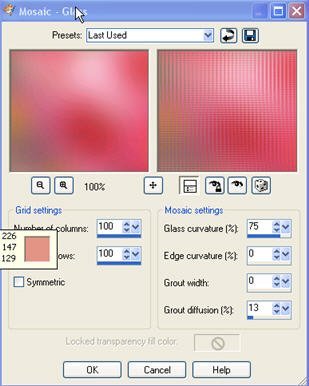
5. Effects>Texture effects>Mosaic glass>100. 100. 75. 0. 0. 13. Symetric unchecked. Click OK.
6. Maximise one of your two copies.
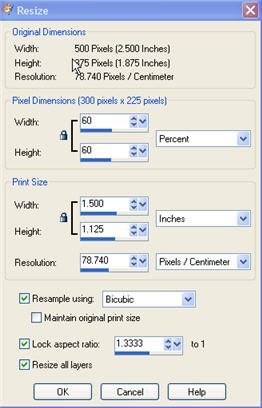
Image>resize> 60% >bicubic>all layers.
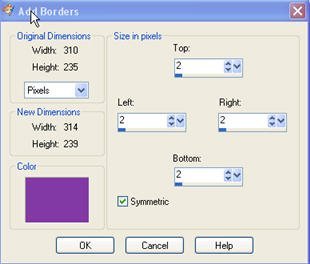
7. >Image>add borders>2pixels, in your dark color.
Image>add borders>1 pixel, in your light color.
Image>add borders>2 pixels, in your dark color.
(Right click on the colored square to change your color)
8. Edit> copy. Back to your original image. Edit> paste as new layer.
9. Move ![]() To top left. (See my image for placement)
To top left. (See my image for placement)
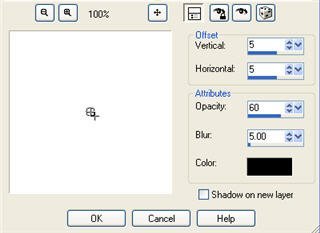
10. Effects>3d effects>drop shadow> 5. 5. 60. 5. color black.
11. In your layer palette make sure raster 1 is selected.
Layers> duplicate>image>mirror. Move to bottom right.( See my image for placement.)
Layers> arrange> move down.
12. In your layer palette make sure copy of raster 1 is selected.
Change your blend mode from normal to soft light. Reduce opacity to 60%
Layers>merge>merge all, flatten.
13. Text ![]() Font of choice. I used CAC Champagne. Size 72. Stroke2.00.Anti alias smooth. Click on your image,
Font of choice. I used CAC Champagne. Size 72. Stroke2.00.Anti alias smooth. Click on your image,
Type It's, apply, move to top right.. (See my image for placement.) Click on your image again. Type Springtime, apply, move to bottom left.
14. Layers> convert to raster layer. Then apply the same drop shadow as before.
15. Layers>merge>merge all, flatten.
16. Image> add borders>2 pixels in your dark color. Symetric checked.
17. Image> add borders 30 pixels, a color not in your graphic. Symetric checked.
18. Magic wand.![]() Click within your 30 pixel border. You should see marching ants.
Click within your 30 pixel border. You should see marching ants.
19. Maximise the remaing copy, Selections> select all. Edit> copy.
Back to your main graphic. Edit> paste into selection.
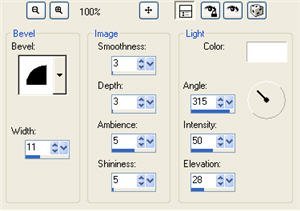
20. With border still selected, Effects>3d effects>inner bevel.
Bevel 2> 11. 3. 3. 5. 5. Angle 315.Intensity 50. Elevation 20. Color white.
Click OK.
21. Selections> Select none.
22. >Image>add borders>2pixels, in your dark color.
Image>add borders>1 pixel, in your light color.
Image>add borders>2 pixels, in your dark color.
(Right click on the colored square to change your color)
Image> resize. As before 500 pixels on the longest side.
You may now add your name, or watermark, and you are then finished.
I do hope you enjoyed this tutorial. Thankyou.
This tutorial belongs solely to
Irene and cannot be distributed through email or any form.
She has allowed PSPx3 to publish on this website and we thank her.
~All Rights Reserved March 2008~