How to Make
a Bling (with Plug-In)
Blings add a wonderful effect to your graphic and thought I would
write a short
tutorial on how to make one. This is a short one, that will require a plug-in.
You
will need to download Xenofex..This is a free 30 day trial. You can download
it here
You
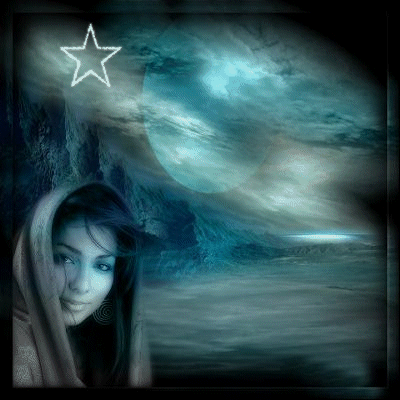
can download the graphic I used here
Open
PSP
1
– In your material palette set your foreground to White and Background to Null
2 - File – New
and open 300 x 300 image
3 - Open your
preset shapes
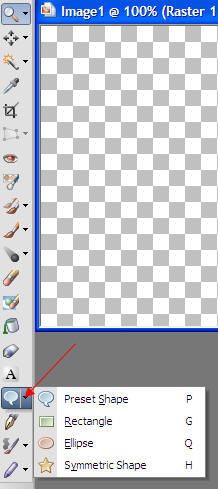
4
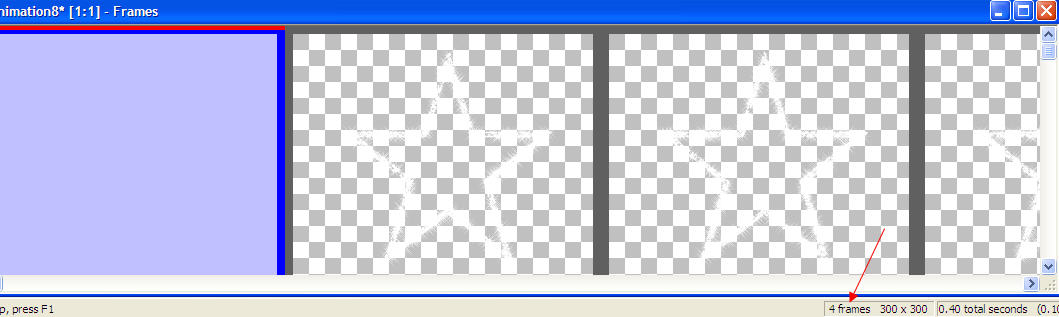
– For my shape, I am choosing the Star
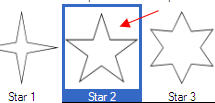
5
– Settings for Star

I
always use Create As vector..
Now
after you place your star on the canvas and size, convert to Raster.
Now
duplicate this 2 times..You will have a total of 3 stars.
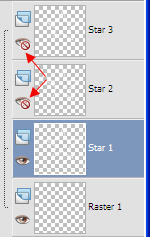
I
rename my layers..This will
avoid confusion.
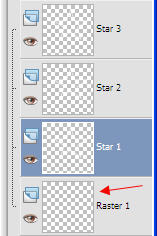
Raster
1 is your background layer.
6-
Now close out the star 2 and star 3
You
do that by clicking on the eye.
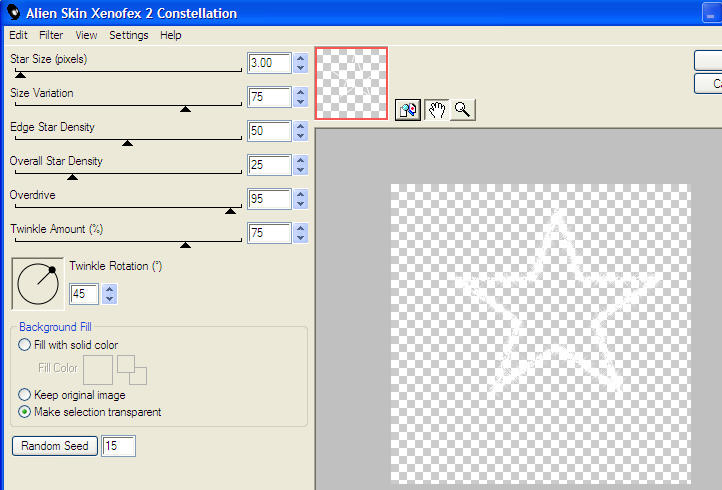
7
– Make sure that you are on the Star 1 layer..You can tell as it will be highlighted.
8 - Now apply the Xenofex / Constellation using the setting below
9 - Close off
Star 1 and open Star 2
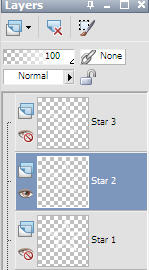
10
– Apply the Xenofex Constellation, but this time
change the random seed to 25
11
– Again, close off Star 2 and Open Star 3.
12
– Apply the Xenofex Constellation again and change
the random seed to 35
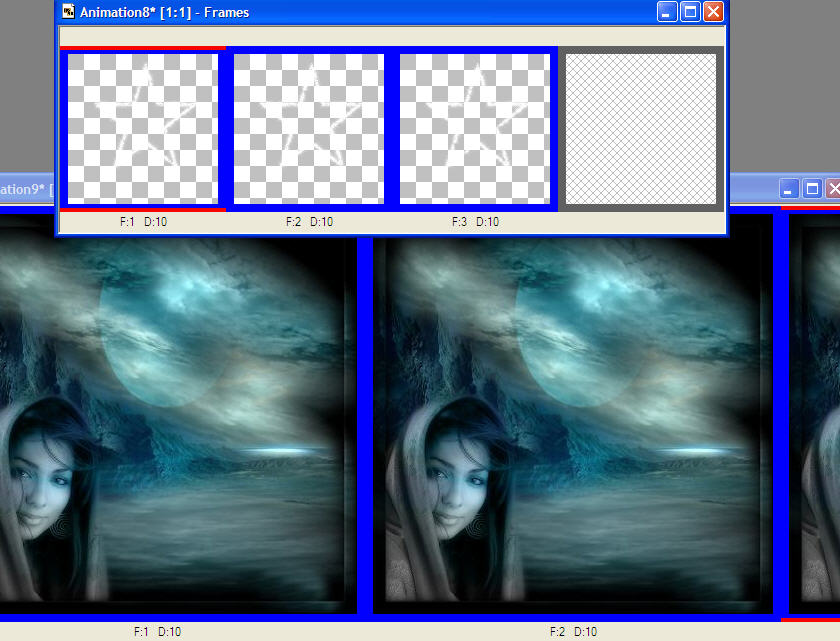
13
– Now close off all the Star layers. This is what you should have
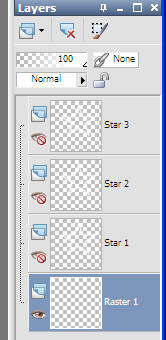
14 - Active Raster
1 (which is your background layer) flood fill with color of your choice
15 – Open all
layers..
16
– Save as a .pspimage
17
– Open Animation Shop
18
– File – Open and browse to where you saved your image
19
– You should have something like this
You
can always check how many frames that are in your image..Look at the bottom bar in AS
20
– Make sure that just the first frame is highlighted..See it in blue – Now hit your delete key
21
– Since we made our bling at 300x300, let’s resize
that a little.
22 - Go to Edit –
and select all
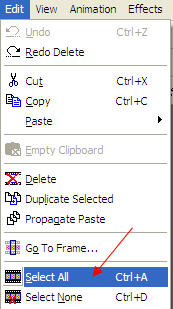
Your
animation should have 3 frames and they should all be highlighted in blue.
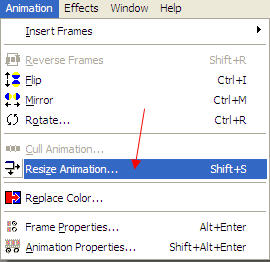
23
– Let’s resize now. Go to Animation –
Resize
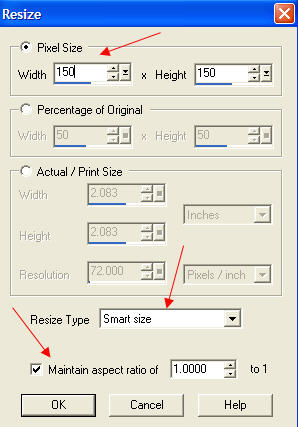
24
– I am resizing mine to 150x150. After
resizing, leave the bling open in AS.
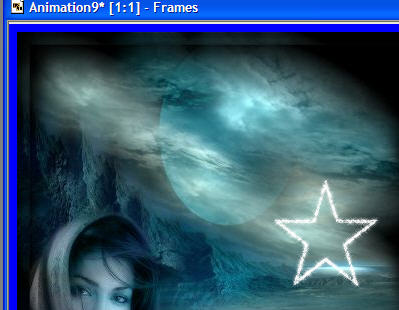
25 - Now the fun part..We are going to add our bling to a graphic.
26. While you are still in AS – open the image
provided – Wind.
27. Working on the Wind graphic – edit copy, and
edit paste after current current frame. Edit paste after current frame again.
You
should not have the same number of frames as in your bling.
28. Still working on the Wind graphic – go to Edit
and Select All. All three frames of your
Wind graphic should be highlighted in blue.
29. If you never closed out your bling, this is what you should have in AS.
30
– Now go to your Bling animation..Make sure that all frames are highlighted. On the first frame, hold down the left mouse
button and drag
to your Moon graphic. Place where you like. Unclick and
the star should show up in all three frames.
31 - You can
preview what your graphic will look like by clicking on the “filmstrip”
If
you are satisfied with your graphic, save as a .gif.
Hope
you have enjoyed this tutorial on how to make your own blings.
Tutorials Index